Taking screenshots in Windows 11 is something almost every user needs at some point. It could be for saving important information, sharing something interesting on your screen, reporting an issue, or even creating guides and tutorials. The good thing is that Windows 11 provides multiple built-in ways to capture your screen, so you do not need any third-party tools for basic needs.
Each method has its own advantage depending on what you want to capture. Some are quick for full-screen screenshots, while others let you select a specific area or even capture a scrolling window in some cases. In this article, you will go through all the practical methods to take screenshots in Windows 11 so you can easily pick the one that suits your workflow best.
Also see: How to capture screenshots in Mac
How to screenshot on Windows
Method 1: Using the Print Screen Key (PrtScn)
This is the traditional method of capturing screenshots on a Windows PC or laptop. Just press ‘PrtScn’ and it captures the entire screen and saves it to the clipboard. Now, open an image editing software like Paint and paste the screenshot there to save it.
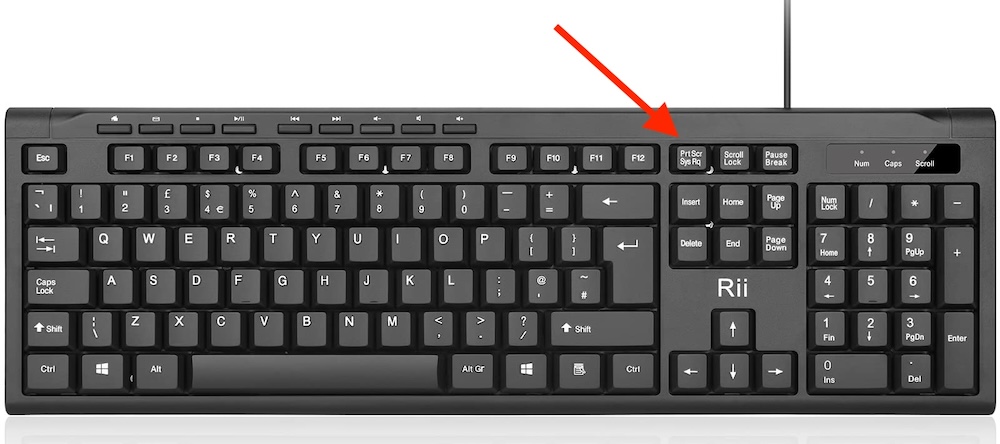
If you want to capture only the active window, not the entire screen, press Alt + PrtScn. This is for people who have multiple windows open and only want to capture one specific window.
However, compact keyboards or laptops with compact keyboards don’t feature a PrtScn button. In that case, you cannot capture screenshots on a Windows PC using this traditional method. So, keep reading for other ways.
Method 2: Using the Snipping Tool
Windows 11 also features a Snipping Tool for capturing screenshots in various modes.

Press Win + Shift + S to open the Snipping Tool. It offers several snip modes, including Freeform, Rectangular, Window, and Full-screen snip. Click and drag to select the area you want to capture. When you release the mouse button, it captures the screenshot.
Once the screenshot is captured, you can annotate it if you want and then save it.
Method 3: Using the Snip & Sketch Tool
Windows 11 also has an improved version of the Snipping Tool called the Snip & Sketch tool, which comes with additional features to make it better.
You can search for ‘Snip & Sketch’ in the Start menu to open the tool. Alternatively, Press Win + Shift + S to open it. When the tool is open, click on the New button in the Snip & Sketch window to start capturing a screenshot. After capturing the screenshot, it opens the screenshot in a new window where you can annotate, draw, or highlight parts of the screenshot. Once you are done, save it to your computer.
Method 4: Using Keyboard Shortcuts
In addition to the methods mentioned above, Windows 11 offers several keyboard shortcuts for capturing screenshots:
- Win + PrtScn: Captures the entire screen and saves it as a file in the Screenshots folder in the Pictures library.
- Alt + Win + PrtScn: Captures the active window and saves it as a file in the Screenshots folder.
- Win + Shift + S: Opens the Snip & Sketch tool for capturing a custom screenshot.
Method 5: Install Third-Party Screenshot Utility
Although Windows 11 has a built-in tool for capturing screenshots, you can also opt for a third-party screenshot tool for more advanced features and customization. There are several third-party screenshot tools available offering advanced editing tools, cloud integration, and more. Some notable screenshot tools are Greenshot, Snagit, and Lightshot.
Wrap Up
Now you know that capturing screenshots on Windows 11 is easy. You have keyboard shortcuts and a snipping tool. Some Windows laptops and keyboards also feature a dedicated key for screenshots. So, try all the methods and see what makes you more productive. Experiment with these methods to find the one that best suits your needs and streamline your screenshot-taking process.