Screenshots have an important role in our professional life. We capture screenshots for several reasons. As a blogger, I capture screenshots to add to my tech guides. Unlock Windows PC, Mac lacks Print Screen key. So, a person who is new to macOS may find it hard to capture a screenshot on Mac. Capturing screenshots on Mac is easier than capturing them on Windows PC. This is the reason Microsoft added a similar screenshot tool in Windows 10. Apple has also improved its screenshot system after macOS Mojave. So, the Screenshot tool also lets you record the screen if you want a video. Screenshot commands are the same, but the Screenshot utility is now feature-rich. In this detailed article, I will tell you how to quickly capture screenshots on Mac. Read and learn how to take a screenshot on a Mac.
Capture Screenshots on Mac Using keyboard commands
The macOS has different keyboard commands to capture screenshots. Here are the screenshot keyboard shortcuts. How to screenshot on Mac.
1. Capture the entire screen

Command + Shift + 3: It captures a screenshot of the entire desktop and saves it on the desktop.
Command + Shift + 3 + Control: It captures a screenshot of the entire desktop and saves it in the clipboard.
2. Capture a selected area

Command + Shift + 4: It enables the selection marker. Select the part of the screen. It captures a screenshot of the selected part of the screen and saves it on the desktop.
Command + Shift + 4 + Control: It captures the screenshot of the selected part and saves it in the clipboard.
3. Capture a single window

If you want to capture a single Window, you can press the Command + Shift + 4 keys simultaneously and the pointer becomes a crosshair. Then press the Spacebar and the pointer changes to a camera icon. Then you can hover over any window and it will be highlighted. Click on the window you want to capture. It will save the screenshot to your desktop.
4. Capturing using the Screenshot app
If you want advanced screenshot options, press Command + Shift + 5 keys simultaneously. It will load the Screenshots toolbar. You can use it to capture the Entire Screen, Selected Window, or Selected Portion.
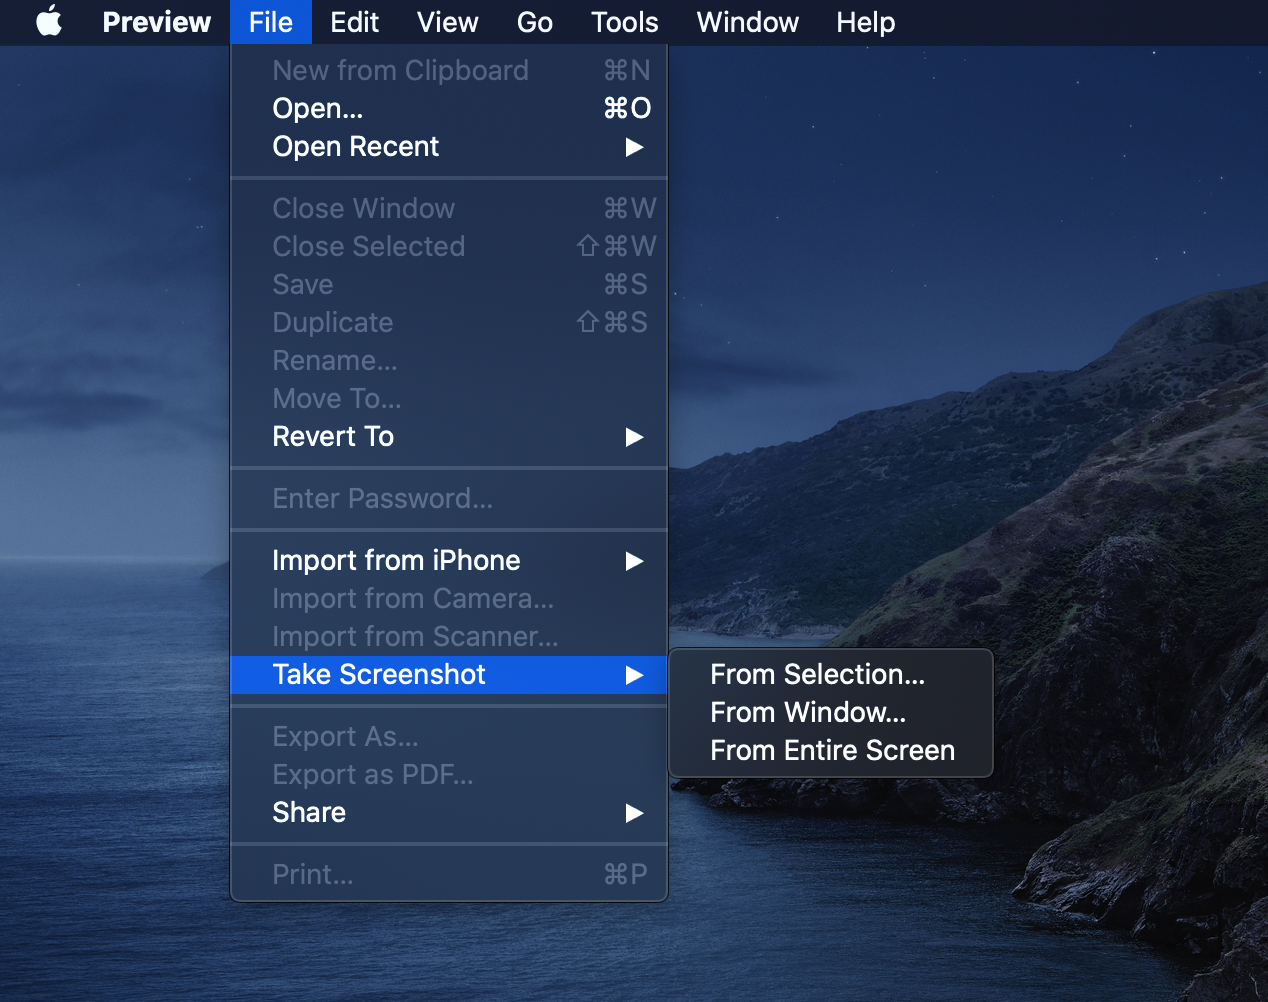
Capture a screenshot on Mac Using the Preview app
The Preview app on Mac is the detail app to open photos and PDF files. It can also be used to convert files from one format to other formats. But very few people know that one can also use it to capture screenshots.
Go to the File menu and then ‘Take screenshot’. You will see different screenshot options.
All the saved screenshots on Mac can be found on the desktop. Mac captures screenshots in PNG format, but you can also change the screenshot file format if you want.
As soon as you capture a screenshot, it shows a small thumbnail of the screenshot at the bottom right corner of the screen. You can tap on it to edit the screenshot. You can annotate the screenshot as per your need.
Here are a few supportive guides.
- Change the Default Save Location of Screenshots in macOS
- How to change Screenshot file format on macOS
- How to change screenshot keyboard shortcuts on macOS
It is better than the Print Screen key on Windows PC that just copies the entire screen on the clipboard and then you have to paste it on Paint or any other software to get the desired area cropped. macOS lets you select the area you want and the screenshot is saved on the desktop. You have a screenshot ready in 2-3 seconds.
Take a Timed Screen Shot in Mac OS X
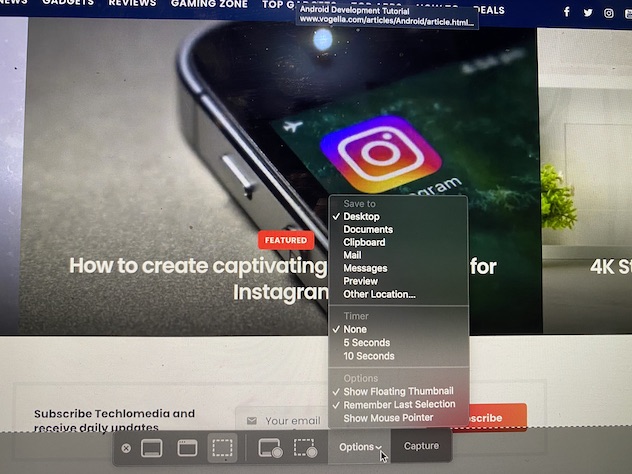
In macOS Mojave or later, you can also set a timer and select the location where the screenshots are saved. For this, you need to use the Screenshot app. Press Command + Shift + 5 keys at the same time and it will open the Screenshot app. Then click on Options for screenshot location and Timer.
Capture Screenshots on Mac Third-party screenshot apps
Even if the default screenshot options are enough, there are also a few Third-party Mac OS screenshot apps. CleanShot X is a popular screenshot app for macOS that lets you capture a window, full screen, area, or even scrolling content. You can not just capture a screenshot, but also record a video. The app also lets you add annotations, blur specific parts, or draw. So basically you get several other features that are not available in the default screenshot app available on the macOS.
Wrap Up
Now you know different ways of capturing a screenshot on Mac. While many people are familiar with basic screenshot keyboard shortcuts, capturing and copying the screenshot to the clipboard instead of saving it on the desktop remains a mystery to them. I am sure this article was useful to you. Don’t forget to share it with your friends and follow us on different social media channels.