
If you use a Windows PC for gaming, video editing, or heavy multimedia work, you may have heard about the DirectX Diagnostic Tool. Most users ignore it until something goes wrong. But this small built-in utility can quickly tell you what is happening inside your system.
In this article, let us understand what the DirectX Diagnostic Tool is, why it matters, and how you can use it properly.
What Is the DirectX Diagnostic Tool (DxDiag)
The DirectX Diagnostic Tool, also known as DxDiag, is a built-in Windows utility that collects detailed information about your system hardware and DirectX components.
DirectX is a set of technologies developed by Microsoft that helps Windows handle graphics, sound, and gaming tasks. Modern PC games and many creative applications depend heavily on DirectX to work properly.
DxDiag scans your system and shows information about:
- Your Windows version
- Processor details
- Installed RAM
- Graphics card information
- Audio devices
- Driver versions
- Installed DirectX version
It is mainly used for troubleshooting performance issues, game crashes, graphics glitches, and sound problems.
Why the DirectX Diagnostic Tool Is Important
Many users face issues such as games not launching, sudden crashes, screen flickering, or missing sound. In most cases, the problem is related to drivers or compatibility.
The DirectX Diagnostic Tool helps you quickly verify whether your system meets the requirements of a game or application. It also helps you confirm whether your graphics driver is outdated or if your DirectX version is compatible.
If you contact customer support for a game or software issue, they often ask for a DxDiag report. That report gives them a complete overview of your system in a single file.
How to Open the DirectX Diagnostic Tool
Opening DxDiag is simple and does not require any installation.
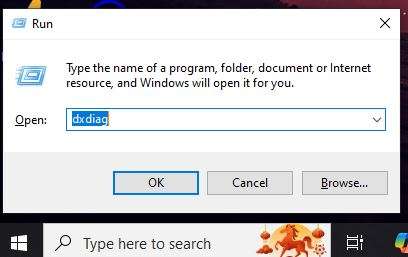
Press Windows key + R on your keyboard. Type dxdiag and press Enter.
Alternatively, you can open the Start menu, search for dxdiag, and click on DirectX Diagnostic Tool.
When it opens for the first time, it may ask whether you want to check for digitally signed drivers. You can click Yes.
The tool will then scan your system for a few seconds and display the results.
Understanding the Different Tabs
The DxDiag window is divided into several tabs. Each tab shows specific information.
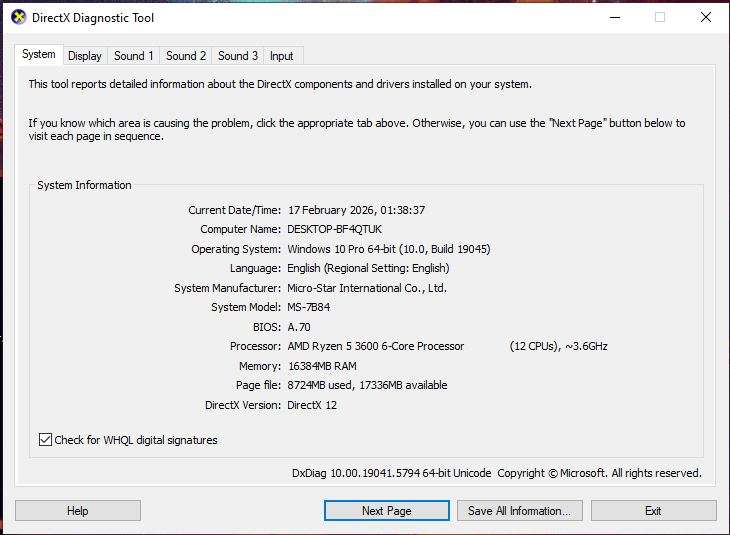
The System tab displays your operating system version, system manufacturer, BIOS, processor, memory, and DirectX version. If you want to confirm which DirectX version your system is running, you will find it here.
The Display tab focuses on your graphics card. It shows the GPU name, manufacturer, available video memory, driver version, and driver date. If a game requires a specific GPU model or driver version, this tab helps you verify that information.
The Sound tab lists your audio devices and their driver details. If you are facing sound issues in games or applications, this section is useful.
The Input tab shows connected input devices such as keyboard, mouse, and controllers.
At the bottom of some tabs, you may see a Notes section. If Windows detects a potential issue, it will mention it there.
How to Check Your DirectX Version
If you want to confirm your DirectX version, open the DirectX Diagnostic Tool and go to the System tab. At the bottom of the window, you will see the DirectX Version field.
Most modern Windows systems show DirectX 12, but this can vary depending on your Windows version.
How to Save a DxDiag Report
One of the most useful features of DxDiag is the ability to generate a detailed report. After opening the tool, click on Save All Information. Choose a location on your PC and save the file. It will create a text file containing complete system information. You can share this file with technical support teams when reporting issues.
When Should You Use DxDiag
You should use the DirectX Diagnostic Tool in several scenarios. Here are a few:
- A game fails to launch
- You experience low performance or lag
- You see graphical glitches
- Audio is not working properly
- You need to check hardware compatibility
It does not fix problems directly. Instead, it helps you identify the cause of the issue.
Final Thoughts
The DirectX Diagnostic Tool is a simple but powerful built-in Windows utility. It gives you a complete snapshot of your system hardware and DirectX environment in just a few clicks.
If you are a gamer, content creator, or someone who frequently installs new software, knowing how to use DxDiag can save time and make troubleshooting much easier.
It may look basic, but when something goes wrong, it becomes one of the most important tools on your Windows PC.